There is a specific culinary magic that happens when the floral aroma of long-grain jasmine rice meets the rich, velvety essence of tropical coconut. This Coconut Rice recipe isn’t just a side dish; it is a sensory experience designed to transport your palate to a sun-drenched coastline.
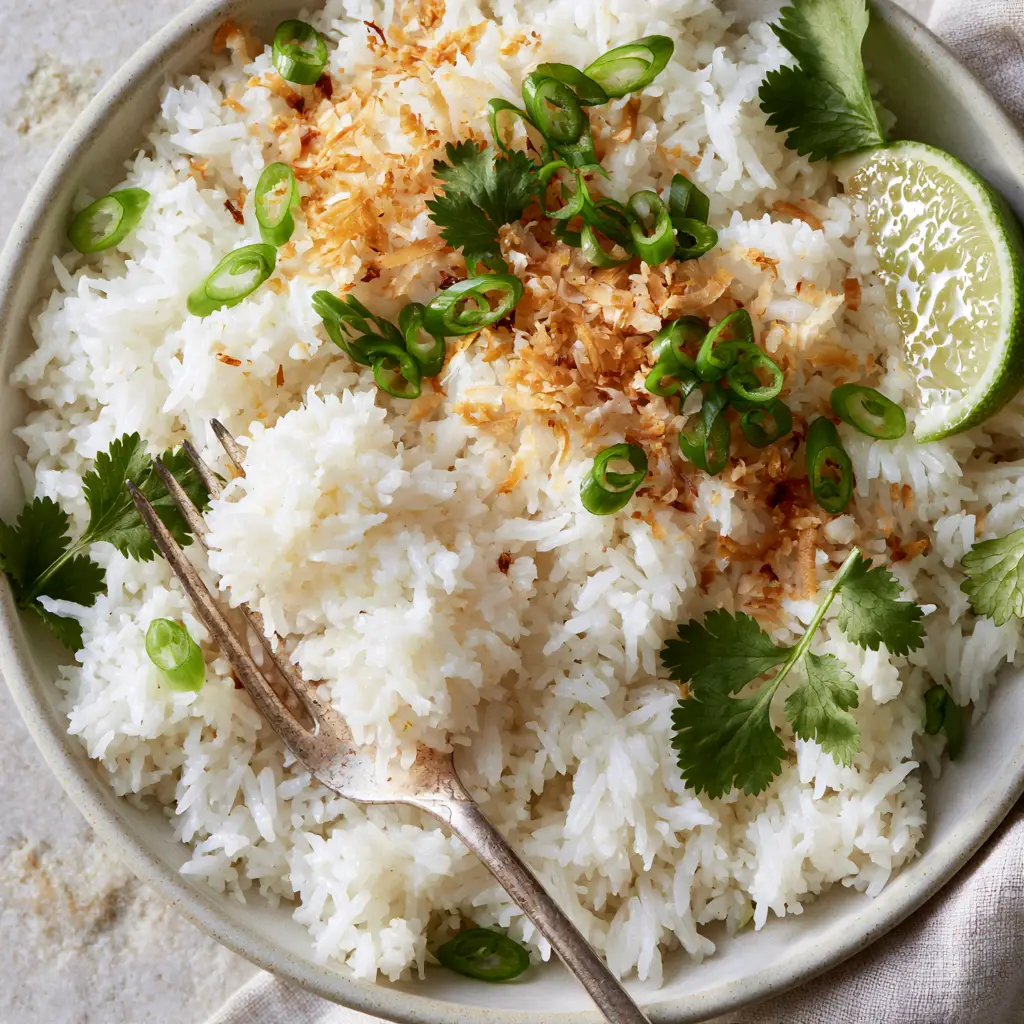
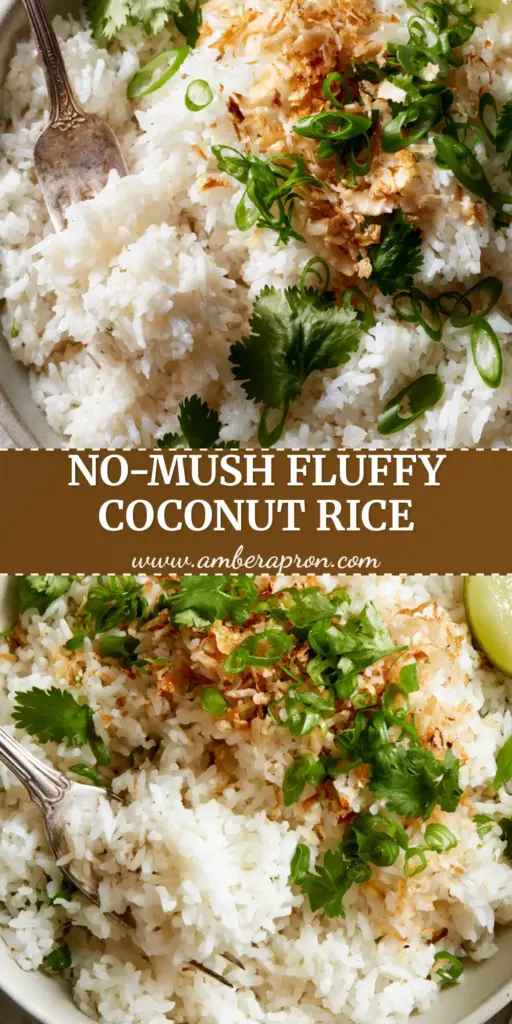
Imagine dragging a silver vintage fork through a mound of rice where every single grain stands proudly on its own—distinct, airy, and impossibly white. This isn’t the mushy, clumping rice often found in amateur kitchens; this is a masterclass in texture and visual appeal.
Whether you are pairing this with a vibrant plantain curry or a perfectly seared tuna steak, the contrast between the tender rice and the crunch of toasted golden coconut flakes creates a gourmet profile that elevates any meal. Let’s dive into the science of the perfect fluff.
The Anatomy of the Perfect Fluffy Coconut Rice
Achieving the visual perfection seen in professional food photography requires more than just boiling water. We are looking for specific structural benchmarks to ensure your Coconut Rice recipe rivals the best Thai bistros.
- Individual Grain Definition: Each grain of jasmine rice must remain separate, avoiding the “porridge” texture caused by excess starch or improper liquid ratios.
- Toasted Textural Contrast: The addition of golden-brown toasted coconut flakes provides a necessary “snap” against the soft, pillowy rice grains.
- Aromatic Balance: A harmony between the fatty richness of coconut milk and the bright, sharp acidity of a fresh, glistening lime wedge.
- Visual Vibrancy: The stark white rice acts as a canvas for the finely sliced bright green scallions and whole, tender cilantro leaves.
Essential Ingredients for Success
Every ingredient in this Coconut Rice recipe serves a dual purpose: structural integrity and flavor depth. We use a combination of pantry staples and fresh aromatics to achieve that signature “lift” with your fork.
Long-Grain Jasmine Rice: 2 cups (400g). Jasmine rice is essential for its natural fragrance and the way its starch structure allows for fluffy separation when rinsed properly.
Full-Fat Coconut Milk: 1 can (13.5oz / 400ml). Always choose full-fat over “lite” versions to ensure the rice is infused with enough lipids to create a silky mouthfeel and distinct grains.
Filtered Water: 1 ¼ cups (300ml). Using a blend of water and coconut milk prevents the rice from becoming too heavy or oily, which can happen with pure coconut milk.
Granulated Sugar: 1 tbsp (12g). A small amount of sugar acts as a flavor enhancer, bridging the gap between the savory rice and the naturally sweet coconut notes.
Fine Sea Salt: 1 tsp (6g). Salt is the “invisible” hero here, sharpening the coconut flavor and ensuring the rice isn’t bland at its core.
Unsweetened Coconut Flakes: ½ cup (45g). These will be toasted until golden to provide the visual and textural “crunch” mentioned in our culinary blueprint.
Fresh Scallions: 2 stalks. Use the green parts only, sliced into paper-thin rounds for a pop of color and a mild, peppery bite.
Fresh Cilantro: ¼ cup (10g) whole leaves. These provide a floral, citrusy finish that cuts through the richness of the coconut milk.
Fresh Lime: 1 large lime, cut into wedges. The glistening juice is vital for balancing the pH of the dish and brightening the overall flavor profile.
The Culinary Toolkit: Equipment You’ll Need
To replicate the high-resolution, sharp focus of professional recipe results, you need the right tools to manage heat and moisture. Precision is the difference between “good” and “extraordinary.”
First, a heavy-bottomed saucepan with a tight-fitting lid is non-negotiable. The heavy base prevents the coconut sugars from scorching at the bottom, while the seal ensures the steam stays trapped to cook the rice evenly.
Second, a fine-mesh sieve is required for the most important preliminary step: rinsing. You must be able to wash away the surface amylopectin (starch) until the water runs clear.
Finally, a wide, shallow matte ceramic bowl is the ideal vessel for serving. This helps dissipate excess steam quickly after fluffing, preventing the rice from overcooking in its own residual heat.
Step-by-Step Instructions for the Ultimate Coconut Rice
Phase 1: The Starch Extraction (Rinsing)
Place your 2 cups (400g) of jasmine rice into a fine-mesh sieve. Run cold water over the rice, agitating the grains gently with your fingers for at least 2 minutes.
Continue this process until the water transition from a cloudy, milky white to perfectly clear. This step is the “secret” to achieving the individual grain separation seen in the visual blueprint.
Phase 2: The Infusion and Simmer
In your heavy-bottomed saucepan, combine the rinsed rice, full-fat coconut milk, filtered water, sugar, and sea salt. Stir once—and only once—to distribute the ingredients.
Bring the mixture to a gentle boil over medium-high heat. As soon as you see the first bubbles breaking the surface, turn the heat to the lowest possible setting and cover the pot tightly with the lid.
Phase 3: The Steam and the “Golden” Topping
Simmer the rice undisturbed for 18 minutes. While the rice simmers, place the coconut flakes in a small skillet over medium heat. Stir constantly until they turn a deep, toasted golden brown and smell like toasted marshmallows.
Remove the rice from the heat but do not open the lid. Let it sit, undisturbed, for an additional 10 minutes. This allows the moisture to redistribute, resulting in that airy, light texture.
Phase 4: The Final Fluff and Garnish
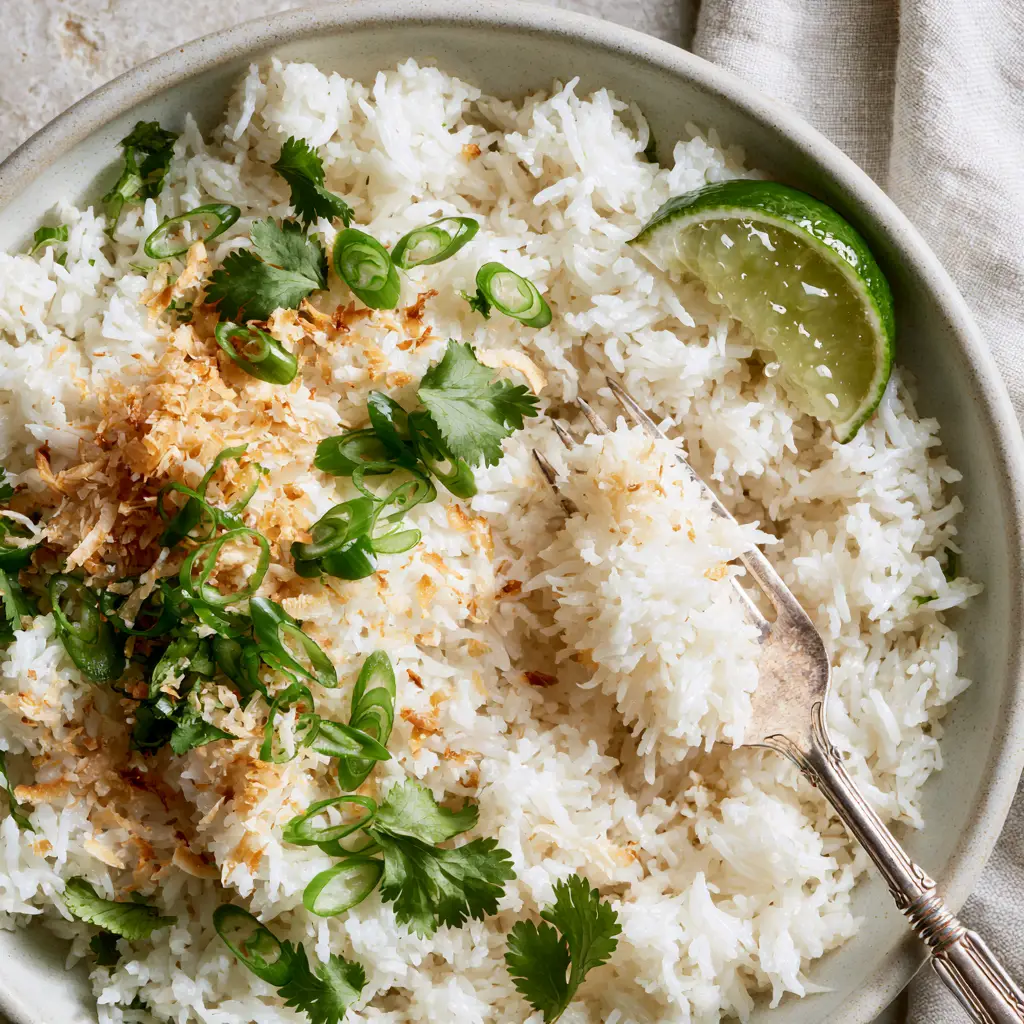
Remove the lid and use a silver fork to gently lift and fold the rice. You should see steam rising and notice that the grains are long, distinct, and glistening white.
Transfer the rice to a shallow ceramic bowl. Scatter the toasted coconut flakes generously over the top, followed by the sliced scallions and fresh cilantro leaves. Place a lime wedge on the rim, ensuring it looks fresh and ready for squeezing.
Expert Tips for Success
- Temperature Control: If your burner runs hot even on “low,” use a heat diffuser. Scorched coconut milk at the bottom of the pan will ruin the clean, white aesthetic of the dish.
- The “No-Peek” Rule: Every time you lift the lid during the steaming phase, you lose the precise pressure required to cook the center of the grain. Trust the timer!
- Freshness Matters: Only slice your scallions and cilantro moments before serving to ensure they remain “bright green” and don’t wilt against the warm rice.
- The Fork Method: Never use a spoon to fluff rice. A spoon mashes the grains together, whereas a fork separates them, maintaining the “ultra-fluffy” result.
What to Serve with This Coconut Rice Recipe
The versatility of this dish makes it a perfect companion for a variety of global flavors. If you’re looking for a refreshing pairing, try it alongside a Mexican street corn salad for a fusion of textures.
For a high-protein dinner, this rice serves as the perfect base for a sesame ginger tuna steak or even a tangy Thai basil chicken. The coconut notes also beautifully complement the acidity found in our blackberry coconut pink drink for a cohesive tropical theme.
Storage, Reheating & Freezing
Coconut rice can be stored in an airtight container in the refrigerator for up to 3 days. Because of the fat content in the coconut milk, the rice may firm up significantly when cold.
To reheat, add a teaspoon of water or coconut milk and microwave on medium power, covered, to re-steam the grains. For long-term storage, you can freeze this rice for up to one month; however, the toasted coconut flakes should be added fresh after reheating to maintain their crunch.
Frequently Asked Questions
While you can, lite coconut milk lacks the fat content required to create the rich flavor and silky texture that makes this recipe restaurant-quality.
Jasmine rice is highly recommended for its fragrance and starch profile. Basmati can work, but the classic Thai-style flavor profile requires jasmine.
Toast them in a dry skillet over medium heat, stirring constantly. They can go from golden to burnt in seconds, so watch them closely!
Use a heavy-bottomed saucepan and keep the heat on the lowest possible setting. The sugars in coconut milk burn easily on thin-walled pots.
Stickiness is usually caused by excess surface starch. Ensure you rinse the jasmine rice in a fine-mesh sieve until the water runs completely clear before cooking.
The Ultimate Ultra-Fluffy Coconut Rice Recipe
Coconut Rice Recipe: The Secret to Ultra-Fluffy, Restaurant-Style Grains
Ingredients
Equipment
Method
- Place jasmine rice in a fine-mesh sieve and rinse under cold water for 2 minutes, agitating with your fingers until the water runs clear. This removes surface starch to ensure fluffy, individual grains.
- In a heavy saucepan, combine rinsed rice, coconut milk, water, sugar, and salt. Bring to a boil over medium-high heat.
- Immediately reduce heat to the lowest setting, cover tightly, and simmer for 18 minutes without lifting the lid.
- Remove from heat and let the rice sit covered for 10 minutes to allow the moisture to redistribute for an airy texture.
- While rice rests, toast coconut flakes in a dry skillet over medium heat until golden brown and fragrant.
- Use a silver fork to fluff the rice. Serve in a matte bowl topped with toasted coconut, sliced scallions, cilantro leaves, and a lime wedge.
Notes
Use a heavy-bottomed pot to prevent the coconut milk from burning on the bottom.
Closing & Call to Action
Mastering this Coconut Rice recipe is a gateway to professional-level home cooking. The combination of aromatic jasmine, rich coconut, and bright garnishes creates a dish that is as beautiful as it is delicious. The key is in the details—the rinsing, the resting, and the toasted crunch.
If you enjoyed this tutorial, please leave a comment below and let us know what you paired it with! Don’t forget to save this recipe to your “Tropical Favorites” board on Pinterest so you never lose the secret to perfect grains.