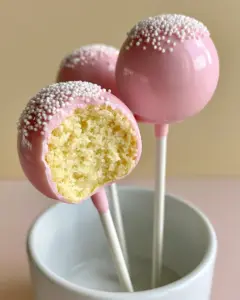
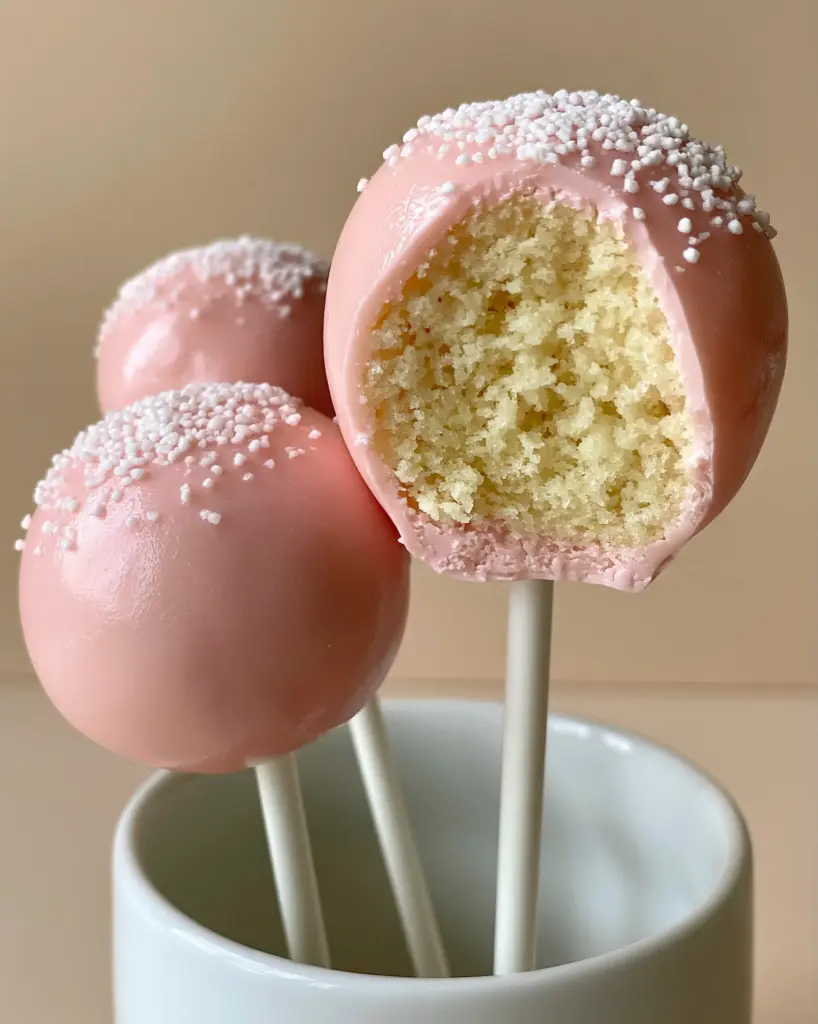
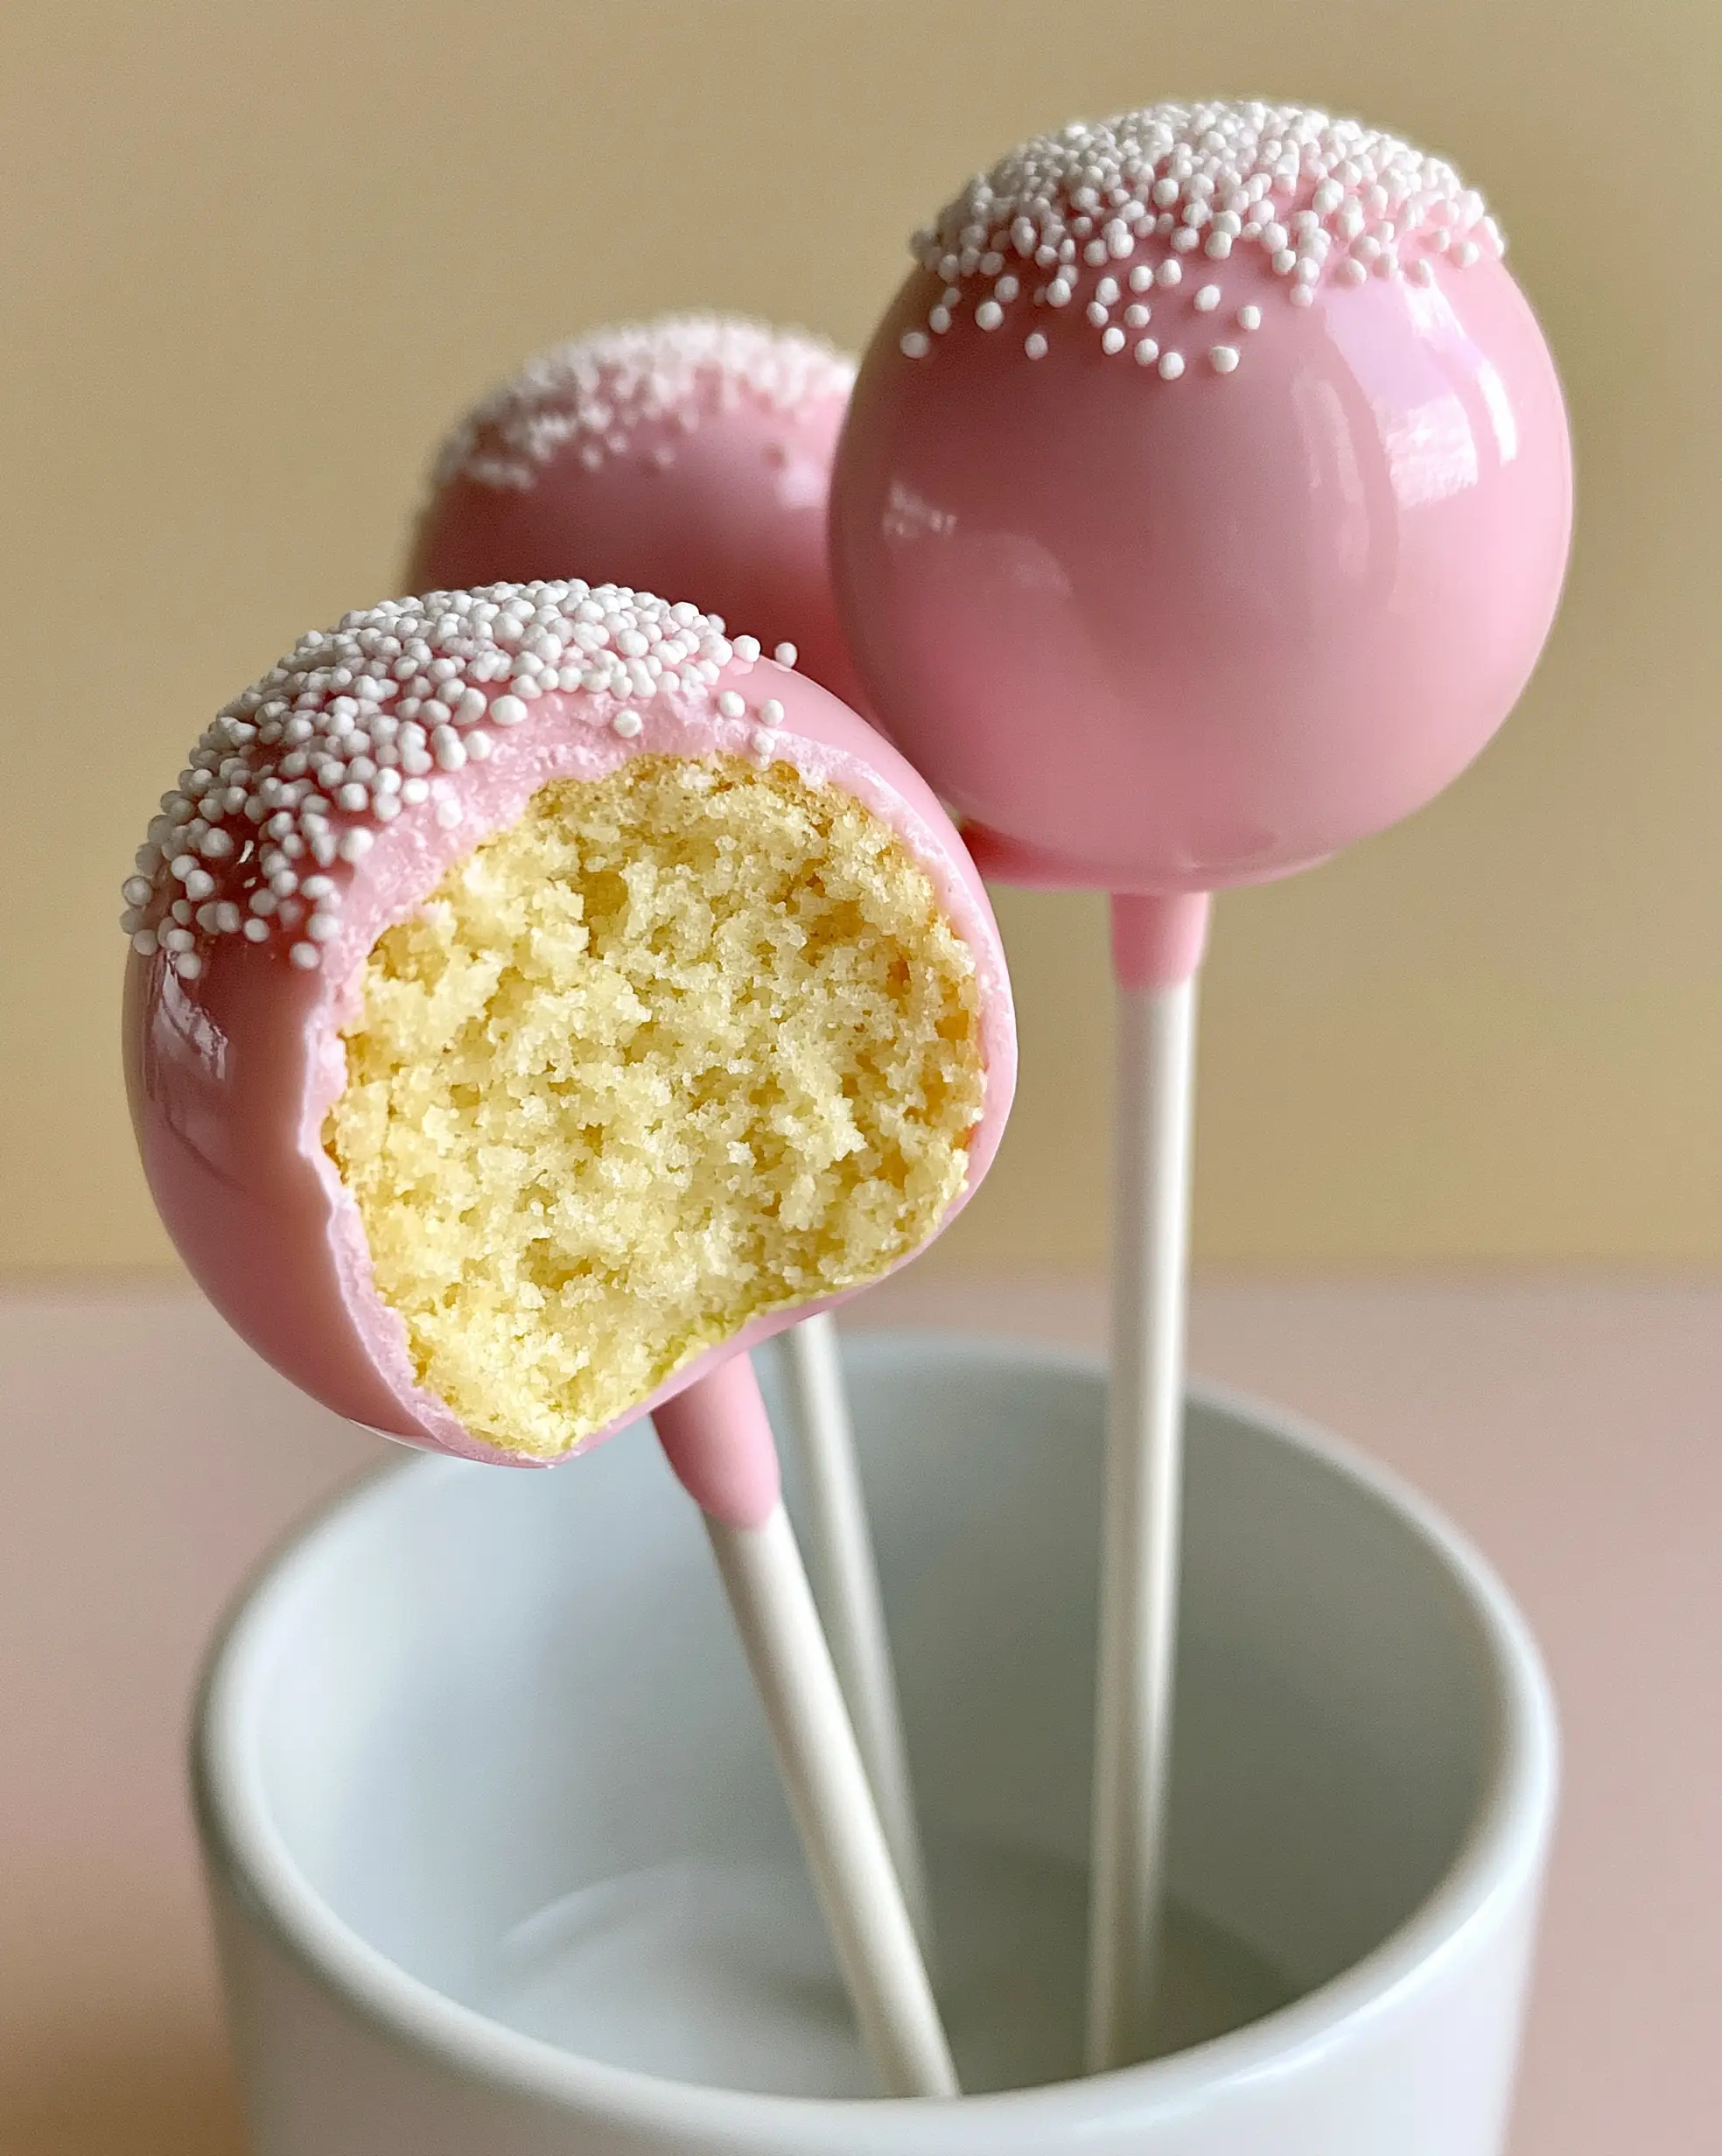
Mastering the perfect cake pop recipes at home doesn’t have to be a mystery reserved for professional bakeries. If you have ever stared longingly at the pastry case of a famous coffee house, you know exactly what we are looking for: that signature glossy pastel pink candy glaze and the incredibly moist baked yellow cake crumb inside. These handheld treats are the perfect marriage of texture and flavor, combining a dense, truffle-like center with a snappy, sweet outer shell. Whether you are prepping for a birthday party or just satisfying a sweet tooth, these cake pop recipes deliver that iconic “bitten open” aesthetic every single time.
Why These Are the Best Cake Pop Recipes You’ll Ever Try
- Perfectly Moist Texture: Unlike dry, crumbly versions, our method ensures a dense, pastel-yellow baked cake center with a tight, uniform crumb.
- Professional Glossy Finish: We use specific tempering techniques to achieve a thick glossy pastel pink candy glaze that stays smooth without cracking.
- Iconic Visuals: Topped with tiny white sugar sprinkles and served on classic white paper cake pop sticks, they look like they came straight from the Starbucks counter.
- Pinterest-Ready Results: These are designed to be stable, snackable, and highly photogenic for your next social media post.
When you are planning a full dessert spread, these pops pair beautifully with other handheld treats like gingerbread macarons or even served alongside fruity options like strawberry shortcake cupcakes. If you’re hosting a full party, don’t forget to check out our savory crowd-pleasers like mexican street corn salad to balance out the sugar!
The Essential Ingredients for Bakery-Quality Results
Success with cake pop recipes starts with the quality of your base. We aren’t just using a box mix; we are building flavor and structure from the ground up to ensure the pops stay on the stick and melt in your mouth.
For the Moist Yellow Cake Base
Cake Flour: 2.5 cups (300g). Cake flour has a lower protein content than all-purpose flour, which is the secret to that tight, uniform crumb seen in professional photos.
Unsalted Butter: 1 cup (225g), softened. Butter provides the fat necessary for a moist baked yellow cake that doesn’t feel greasy.
Granulated Sugar: 1.5 cups (300g). This provides sweetness and helps aerate the butter during the creaming process.
Large Eggs: 3 eggs, room temperature. Eggs provide the structure. Using room temperature eggs ensures they emulsify perfectly into the batter.
Whole Milk: 1 cup (240ml). Milk adds moisture and creates a tender crumb.
Vanilla Extract: 2 teaspoons (10ml). A high-quality extract is essential for that nostalgic “birthday cake” flavor profile.
For the Glossy Pink Coating & Assembly
Pink Candy Wafers: 16 oz (450g) pastel pink candy melts. These are specifically formulated to create a thick glossy pastel pink candy glaze that sets hard at room temperature.
Vanilla Buttercream: 0.5 cup (120g). This acts as the “glue” that transforms cake crumbs into a moldable dough.
White Sugar Sprinkles: 2 tablespoons. A neat dusting of white sugar sprinkles adds the final touch of texture to the top curve of each sphere.
White Paper Sticks: 24 count. Standard 6-inch white paper cake pop sticks provide the classic look and stability needed for upright display.
How to Make Professional Cake Pops Step-by-Step
Step 1: Baking the Signature Yellow Cake
Preheat your oven to 350°F (175°C). Grease and flour a 9×13 inch baking pan. In a large bowl, cream the softened butter and sugar until light and fluffy—this usually takes about 3-4 minutes with a hand mixer. Add eggs one at a time, followed by the vanilla.
Alternately add the cake flour and milk, beginning and ending with the flour. Mix until just combined. Pour the batter into the prepared pan and bake for 25-30 minutes. You are looking for a pastel-yellow baked cake center that springs back when touched. Let the cake cool completely. A warm cake will melt your frosting, ruining the texture of the cake pop recipes.
Step 2: The Art of the Crumble and Bind
Once cooled, break the cake into large chunks. Using your hands or a food processor, pulse the cake until it resembles fine, sandy crumbs. There should be no large chunks remaining. This is the foundation of the tight, uniform crumb.
Add the vanilla buttercream one tablespoon at a time. Mix with your hands until the dough holds together when squeezed, similar to the consistency of playdough. Expert Tip: Do not over-add frosting, or the pops will be too heavy and slide right off the sticks!
Step 3: Rolling Flawless Spheres
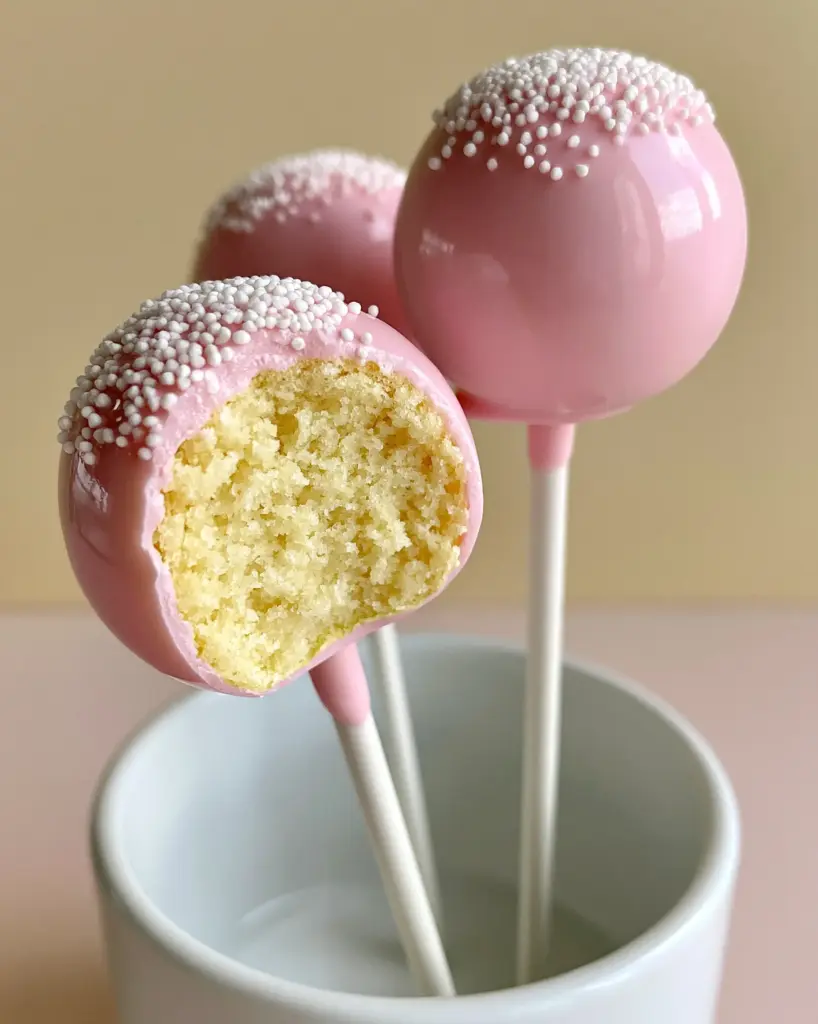
Scoop about 1.5 tablespoons of dough and roll it between your palms to form a perfectly smooth sphere. Each ball should be about 1.25 inches (3cm) in diameter. Place them on a parchment-lined tray. You should get approximately 20-24 balls.
Place the tray in the refrigerator for at least 30-60 minutes. Chilling is a non-negotiable step in all cake pop recipes; it firms up the fats so the balls stay spherical during the dipping process.
Step 4: Creating the Glossy Pink Candy Shell
Melt the pink candy wafers in a microwave-safe bowl in 30-second intervals, stirring well between each. Once smooth, you should have a thick glossy pastel pink candy glaze. If the coating is too thick, add a teaspoon of vegetable oil or coconut oil to thin it out to a dipping consistency.
Dip the tip of a white paper cake pop stick into the melted candy, then insert it halfway into a chilled cake ball. This acts as a “weld” to keep the pop secure. Let these set for 5 minutes before the full dip.
Step 5: The Masterful Dip and Decorate
Submerge the cake pop vertically into the pink glaze until the cake is completely covered. Lift it straight out—do not stir! Gently tap your wrist to allow excess coating to drip off. While the glaze is still wet, add a neat dusting of white sugar sprinkles to the top curve.
Place the pops upright in a minimalist white ceramic holder or a styrofoam block to dry. This ensures a perfectly smooth, glossy pastel pink candy shell with zero cracks.
Expert Tips for Success with Cake Pop Recipes
- Avoid the “Ooze”: If your cake pops are leaking oil, your frosting-to-cake ratio is too high. Aim for a dough that feels like damp sand, not wet mud.
- Temperature Control: If the cake balls are too cold and the candy coating is too hot, the shell will crack as it expands. Let the chilled balls sit at room temperature for 5 minutes before dipping.
- Silky Smooth Finish: Use a deep, narrow glass for dipping. This allows you to submerge the pop in one motion without hitting the sides, creating that flawless Starbucks-style look.
- Stick Security: Always dip the stick in candy coating before inserting it into the cake ball. This is the only way to ensure they don’t fall off when you turn them upside down to dip.
Storage, Reheating & Freezing
Cake pop recipes are excellent for make-ahead treats! You can store the finished pops in an airtight container at room temperature for up to 5 days. For longer storage, refrigerate them for up to 2 weeks.
Can you freeze cake pops? Yes! Wrap each pop individually in plastic wrap and store them in a freezer-safe bag for up to 3 months. Thaw them in the refrigerator overnight. Avoid thawing at room temperature, as condensation can form on the glossy pastel pink candy glaze, causing the sugar sprinkles to dissolve.
What to Serve With These Treats
These sweet pops are the perfect conclusion to a gourmet meal. Consider serving them after a savory main course like our baked dijon salmon or a comforting monterey chicken spaghetti. If you are hosting a brunch, they look stunning next to a variety of refreshing drink recipes like iced lattes or hibiscus teas.
Frequently Asked Questions
Yes, you can substitute a boxed yellow cake mix and canned frosting, but the texture may be slightly less dense than our scratch-made recipe with cake flour.
Gently tap your wrist, not the pop itself, to remove excess coating. If you see air bubbles, pop them with a toothpick while the candy is still wet for a flawless finish.
Adding a tiny amount of vegetable shortening or coconut oil to your melted candy wafers helps thin the consistency and creates a higher-shine finish once set.
This usually happens if the cake balls are too heavy (too much frosting) or if they weren’t chilled long enough. Always dip the stick in melted candy before inserting it into the cake ball to create a secure bond.
Cracking is caused by extreme temperature changes. If your cake balls are freezing cold and your candy is very hot, the shell will crack. Let chilled balls sit at room temp for a few minutes before dipping.
The Ultimate Starbucks-Style Pink Cake Pop Recipe
Cake Pop Recipes: The Ultimate Starbucks-Style Pink Cake Pops
Ingredients
Equipment
Method
- Cream butter and sugar, add eggs/vanilla, and alternate flour and milk. Bake at 350°F (175°C) for 25-30 mins in a 9x13 pan. Cool completely.
- Crumble the cooled cake into fine sandy crumbs using your hands or a food processor until no large chunks remain.
- Mix in vanilla buttercream until dough holds together. Roll into 1.25-inch spheres and chill for 60 minutes.
- Melt pink candy. Dip stick in candy, insert into ball. Submerge entire ball in pink glaze. Tap off excess and top with white sprinkles.
Notes
Tip 2. Ensure cake balls are chilled but not frozen to prevent the shell from cracking.
Save This Recipe to Pinterest!
Did you love these cake pop recipes? Make sure to save this post to your favorite Pinterest board so you can find it later! Following amber_apron ensures you never miss a new bakery-style dessert. If you make these, please share a photo in the comments and leave a 5-star rating below. We love seeing your flawless glossy shells and moist yellow cake centers!