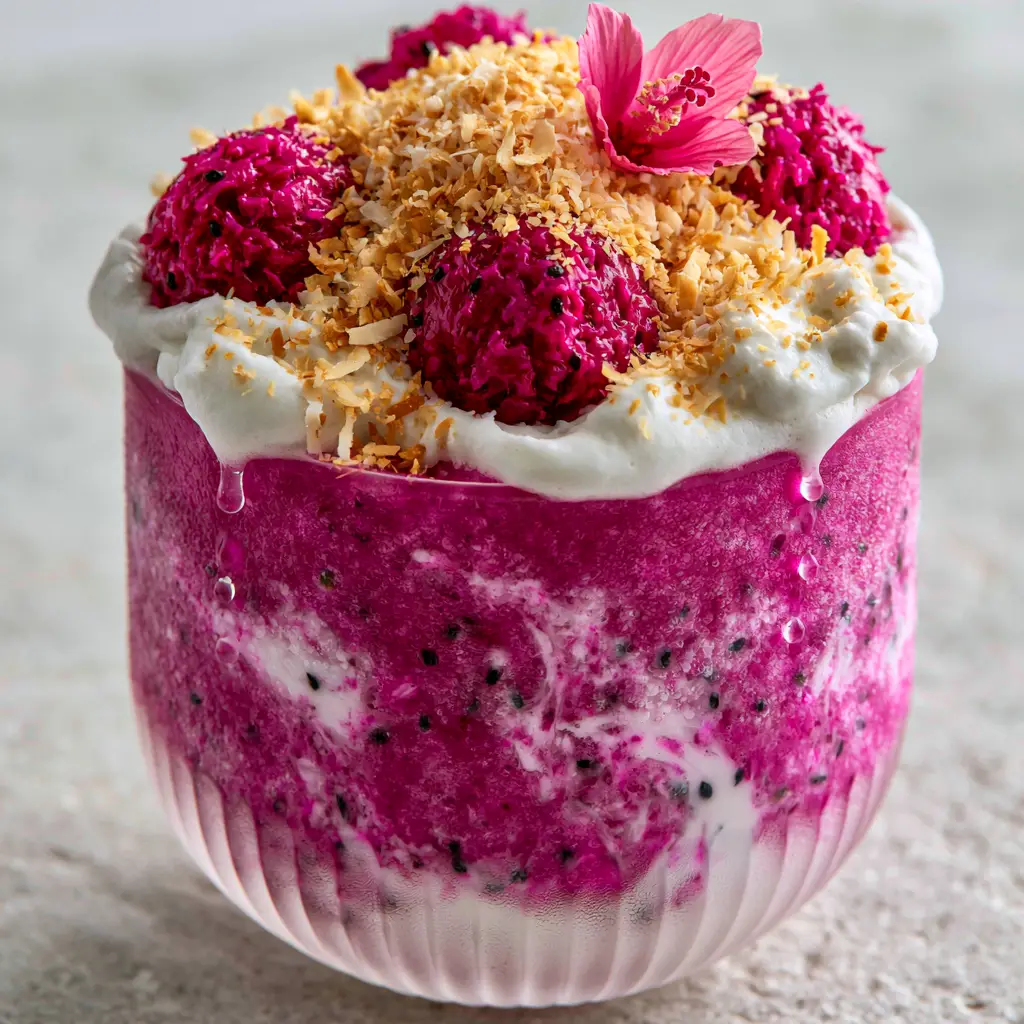
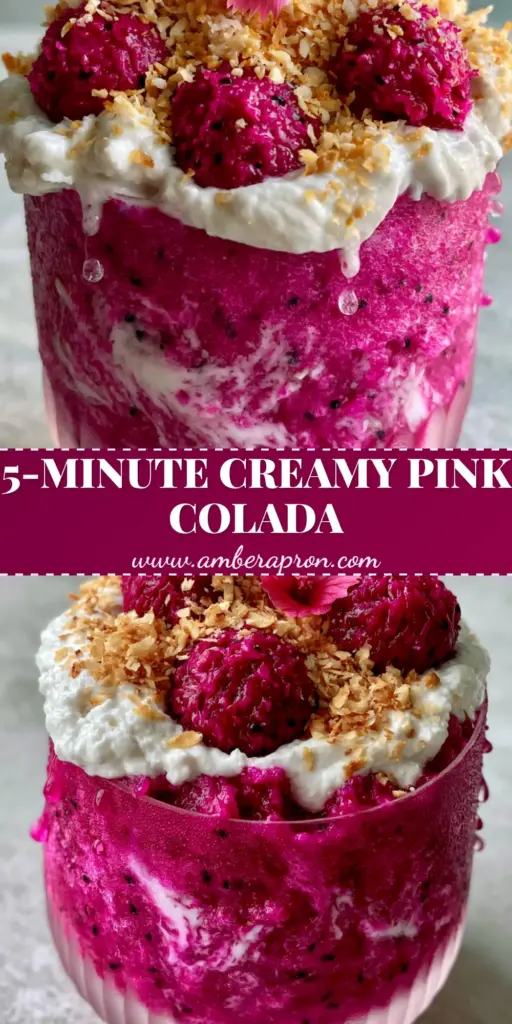
The Dragon Fruit Colada is more than just a drink; it is a multisensory tropical escape served in a glass. With its electric magenta hue and velvety white coconut swirls, this beverage captures the very essence of a golden hour sunset on a secluded beach.
Imagine holding a chilled, frosted ribbed glass, feeling the condensation droplets on your palm while the aroma of toasted coconut wafts upward. This recipe meticulously recreates that high-end resort experience right in your home kitchen using authentic, vibrant ingredients.
Whether you are looking for a refreshing afternoon pick-me-up or a stunning centerpiece for your next gathering, this Dragon Fruit Colada delivers on every promise. It combines the earthy, subtle sweetness of pitaya with the rich, fatty decadence of premium coconut cream.
Why This Dragon Fruit Colada is the Ultimate Summer Showstopper
- Visual Masterpiece: The striking contrast between the bright magenta pitaya base and the thick, snowy coconut cream swirls creates a professional “social media aesthetic” without the need for filters.
- Textural Complexity: Experience a symphony of textures, from the frosty ice crystals and creamy whipped topping to the crunch of toasted coconut and the juicy pop of fresh dragon fruit spheres.
- Clean Ingredients: This recipe relies on the natural pigments of pink pitaya and the healthy fats of coconut, making it a refreshing alternative to artificially flavored tropical drinks.
- Refined Flavor Profile: Unlike overly sugary cocktails, this version balances the mild sweetness of the cactus fruit with the nutty depth of toasted coconut and a hint of bright acidity.
The Exotic Anatomy: Ingredients for a Perfect Magenta Blend
Frozen Pink Pitaya Puree: Use 1 pack (100g) of unsweetened frozen dragon fruit puree. This is the primary source of that intense magenta color and provides the thick, frosty structure of the drink.
Thick Coconut Cream: You will need 1/2 cup (120ml) of full-fat canned coconut cream. This ingredient is essential for creating those iconic white swirls and provides the “fatty” mouthfeel necessary for a true colada.
Crushed Ice: 1.5 cups (approx. 200g) of finely crushed ice ensures a smooth, slushie-like consistency. It provides the “high texture” crystal look seen in the most appetizing food photography.
Coconut Milk (Full Fat): 1/4 cup (60ml) serves as the liquid base to help the blender blades catch. It bridges the gap between the frozen puree and the thick cream.
Agave Nectar or Simple Syrup: 1-2 tbsp (15-30ml) depending on your preference. Pitaya is naturally low in sugar, so a small amount of sweetener enhances the tropical fruit notes.
Toasted Shredded Coconut: 2 tbsp (15g) of unsweetened flakes. Toasting these until golden brown adds a smoky, nutty aroma that contrasts beautifully with the cold drink.
Fresh Dragon Fruit: 1/2 of a fresh fruit (white or pink) to create decorative spheres. These add a gourmet touch and a fresh, watery crunch to every sip.
Edible Pink Hibiscus Flower: A single petal or whole flower for garnish. This ties the visual together, matching the vibrant magenta base perfectly.
Essential Tools for Professional Tropical Mixology
To achieve the “extreme close-up” quality of this Dragon Fruit Colada, you need a high-speed blender capable of pulverizing ice into a snow-like texture. A standard blender may leave chunks, which ruins the velvety aesthetic.
A small melon baller is the secret tool for creating those “perfectly round scoops” of dragon fruit. This simple technique elevates the drink from a standard smoothie to a high-end culinary creation.
Finally, ensure you have a ribbed glass or a high-quality tumbler. Placing the glass in the freezer for 10 minutes prior to serving creates that “frosted glass” look and encourages the formation of beautiful water droplets on the side.
Step-By-Step: Crafting the Frozen Pitaya Base
Toasting the Coconut Garnish
Place your shredded coconut in a dry skillet over medium-low heat. Stir constantly for 2-3 minutes until the flakes turn a deep, toasted golden brown and smell intensely fragrant.
Immediately remove the flakes from the pan to a cool plate. This prevents residual heat from burning the delicate coconut, ensuring a perfect crunch for your Dragon Fruit Colada topping.
Prepping the Dragon Fruit Spheres
Slice a fresh dragon fruit in half. Using a small melon baller, press firmly into the flesh and rotate 180 degrees to carve out three perfectly round spheres.
Set these spheres aside on a paper towel. This absorbs excess moisture, ensuring they sit perfectly atop the whipped cream later without sinking or bleeding color prematurely.
Blending the Magenta Core
In your high-speed blender, combine the frozen pitaya puree, crushed ice, coconut milk, and agave nectar. Pulse several times to break up the frozen chunks before blending on high for 30 seconds.
Listen for the sound of the blender to change from a rhythmic grinding to a smooth, consistent hum. This indicates that the ice crystals have reached the desired “high texture” frostiness.
Assembly: Achieving the Iconic Coconut Swirls
Creating the Internal Marble Effect
Take your chilled, frosted glass and drizzle 2 tablespoons of thick coconut cream down the inside walls. Rotate the glass as you pour to create thick, visible white tracks.
Slowly pour the blended Dragon Fruit Colada into the center of the glass. The magenta mixture will push against the cream, creating those beautiful, unedited social media-worthy swirls.
The Whipped Coconut Topping
Using a whisk or a small hand mixer, beat the remaining chilled coconut cream until it forms soft peaks. This creates the “thick cloud” effect described in the visual blueprint.
Spoon the whipped cream gently onto the top of the drink. Avoid stirring; you want the cream to sit prominently as a separate layer above the magenta base.
Final Garnish and Sensory Cues
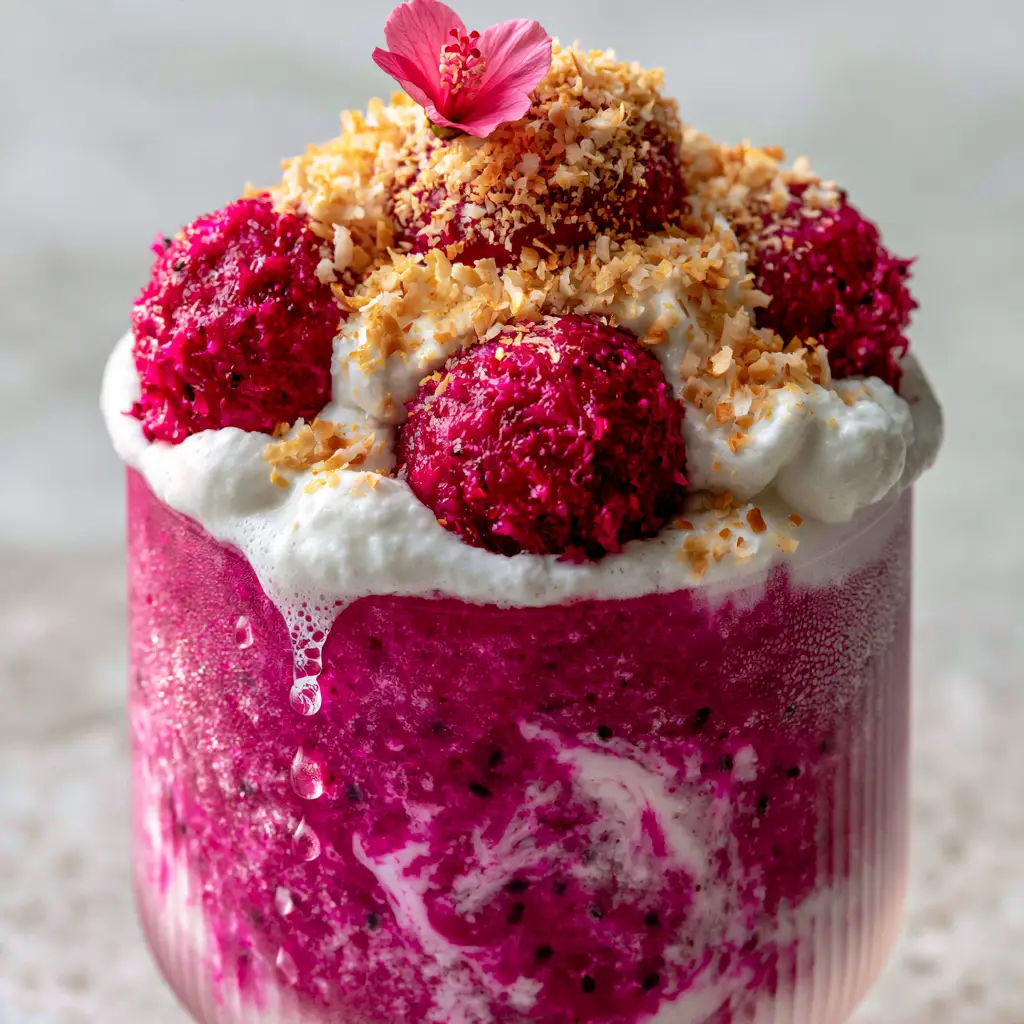
Arrange your three dragon fruit spheres in a cluster on one side of the cream. Generously dust the toasted coconut flakes over the remaining white surface for a golden contrast.
Place the pink hibiscus flower delicately on top. By now, the temperature difference should be causing tiny droplets of condensation to drip down the ribbed glass, catching the light perfectly.
Pro-Tips for Texture and Flavor Balance
- Chill Everything: For the best “frosted glass” look, keep your coconut cream and dragon fruit in the refrigerator until the very second you need them.
- Fat Content Matters: Do not use “lite” coconut milk for the swirls or topping. You need the high fat content of canned coconut cream to maintain the “creamy foam” structure.
- Adjusting Thickness: If your blend is too runny, add another half cup of ice. If it is too thick for the blender, add a tablespoon of coconut milk at a time until it moves.
- Sweetness Balance: Dragon fruit varies in sweetness. Taste a small bit of the puree before blending; if it is particularly tart, increase the agave nectar slightly.
Tropical Pairings: What to Serve Alongside Your Colada
This Dragon Fruit Colada is a decadent treat on its own, but it also pairs beautifully with other tropical and vibrant dishes. For a complete brunch experience, consider serving it with these fresh fruit crepes to mirror the bright berry notes.
If you are enjoying this drink as a mid-afternoon refreshment, it provides a cooling counterpoint to savory snacks. It works surprisingly well alongside these easy gluten-free snack recipes or even a zesty Mexican street corn salad.
For those looking for a dessert-on-dessert pairing, the coconut notes in this drink beautifully complement these mango strawberry sunset cupcakes, creating a full spectrum of tropical flavors.
Frequently Asked Questions
This drink is best served immediately due to the frozen texture. However, you can prep the dragon fruit spheres and toasted coconut ahead of time to speed up the assembly process.
While you can use fresh fruit, frozen pitaya puree is recommended for the intense magenta color and the thick, slushie-like consistency. If using fresh fruit, you will need to double the amount of ice.
To transform this into a cocktail, add 2 oz (60ml) of white rum or coconut rum to the blender before processing. Adjust ice if needed to maintain the thickness.
Dragon fruit has a very mild, subtle sweetness (similar to a kiwi or melon). We add a touch of agave nectar to help the tropical flavors pop, but you can adjust this to your preference.
This usually happens if the coconut cream is too thin or the colada base is too watery. Ensure you are using full-fat canned coconut cream and that the pitaya base is thick and frosty.
The Official Dragon Fruit Colada Recipe
Dragon Fruit Colada: A Vibrant Pink Pitaya and Coconut Dream
Ingredients
Equipment
Method
- Heat shredded coconut in a dry skillet over medium-low heat until golden brown and fragrant (2-3 mins).
- Use a melon baller to create three spheres from a fresh dragon fruit and set aside on a paper towel.
- Combine pitaya puree, ice, coconut milk, and agave in a blender. Process until frosty and smooth.
- Drizzle half the coconut cream inside a chilled ribbed glass to create visible white tracks.
- Pour the pitaya mixture into the glass. Whip the remaining coconut cream and spoon on top.
- Add dragon fruit spheres, toasted coconut, and the hibiscus flower. Serve immediately while frosted.
Notes
Tip 2. Chill your glass in the freezer for 10 minutes to get the perfect condensation effect.
Closing & Call to Action
Mastering the Dragon Fruit Colada is about embracing the vibrant colors and rich textures of the tropics. This drink is a testament to how simple, high-quality ingredients can be transformed into a work of art with the right techniques.
Did you manage to capture that perfect golden hour glow with your drink? We would love to see your results! Leave a comment below and tell us how your coconut swirls turned out.
If you loved this recipe, please share it with your friends and follow us on Pinterest for more visually stunning culinary inspiration. Don’t forget to pin the image below to your favorite tropical drinks board!